
After checking the book several times I decided to go for the Harebell Fichu.
 |
| Taken from Victorian Lace Today |
So, for those who don't know how to make a picot the things is a simple as casting on two stitches (at the beginning of the wrong side) using the knitted on cast on method and then casting those two stitches off using the basic knit bind off. This video is very clear.
The real problem began after completing the garter stitch band. Now I had to knit the lace section and attach it to the band on the go following a set of instructions that tell what kind of join has to be made. This was a bit challenging. The way the edges are made in the patterns of this book are totally different from everything I had made before: picking up stitches and knitting or knitting separetely and sewing or grafting to the body.
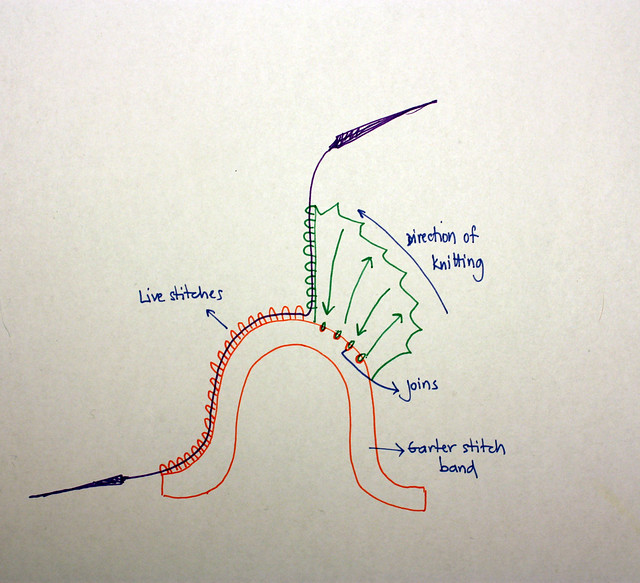
Before starting it was even hard to see or imagine the structure of the Fichu. I made this simple drawing to show how it is worked:
 |
| Fichu schematics |
In this technique the edge is knitted perpendicular to the border where it will be attached instead of parallel as I had always made it. So, in this case I am knitting the lace section which is only ca.30 stitches wide and every 2 or 4 pattern rows I am joining the lace to the garter stitch band following the pattern which tells what kind of join to make in order to avoid holes.
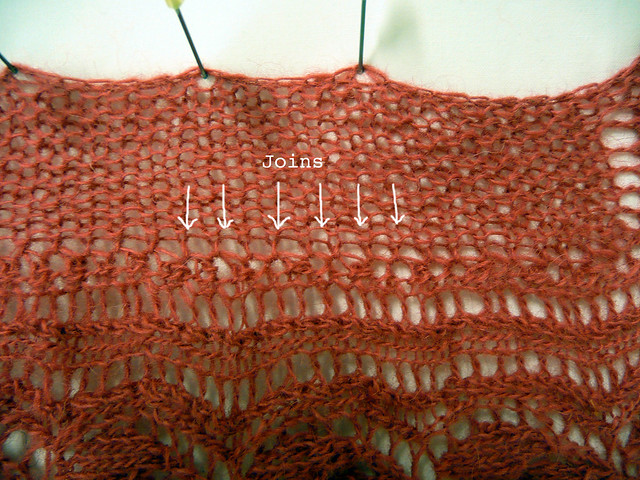 |
| This is the way the joins look like. Pretty neat, isn't it? |
At first I wasn't very sure about how this would work but now that I have already made almost half of it I must say that this works perfectly well and the joins look great! I am really enjoying the process of making this fichu. And one funny thing: I wanted to make a simple and quick project, ha! I was reading about this Fichu and it is apparently one of the most complicated patterns in the hole book, hehe.
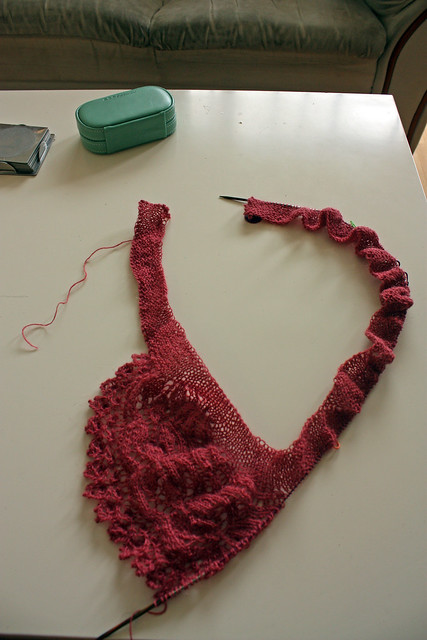 |
| This is what it looks like while knitting it. |
A couple of weeks ago I received a message/surprise on Ravelry from Asun. She wanted to give me a couple of skeins of silk that she had left after finishing a project! How generous is that?! I felt really flattered about becoming the owner of those two skeins especially because I have never knitted anything with silk!
Well, the envelope arrived at the end of last week. I got this cute blue box with a little card, two skeins of black silk and two pens! I still don't have enough words to thank Asunción for this!

Now I already know that my next project will be made with silk... the question now is what. I still have some time to think about it since I am quite busy with the Fichu :)
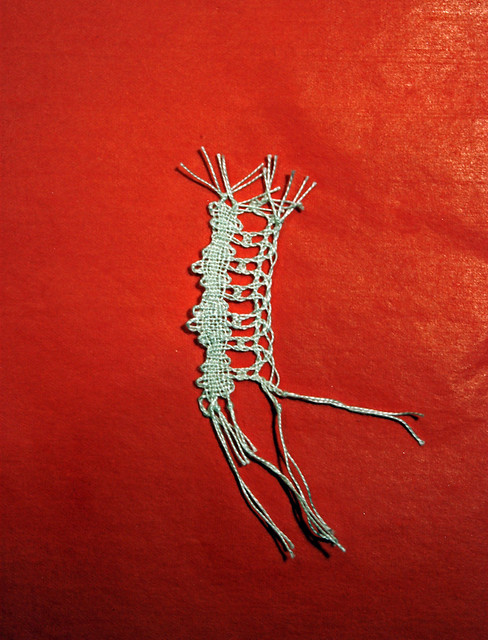
About bobbin lace. I am almost done with all the excercises. So I decided to begin with the patterns section. I started with pattern number 1. I didn't do much of it because I thought I was doing something wrong and also because I think that the thread I am using was too thick for it. Anyways, I want to show you what it looks like:
Then I made the pattern number 2. For the color section I used embroidery thread. It was the only color thread that I had at home. I think it looks really cute:
 |
| Details: Cotton thread n°20, blue embroidery thread, 16 bobbins |
And I also made number 3. But I think that this one was a total DISASTER. The thread is definitely too thick. It is cotton n°20. I think I should have used n°30 or 40 for this. Too bad I realized so late that tt was getting to chunky. For this pattern I got some help from Eva (thank you so much again!) because I was clueless about how to hand the bobbins to begin. Well, this is the chunky result:
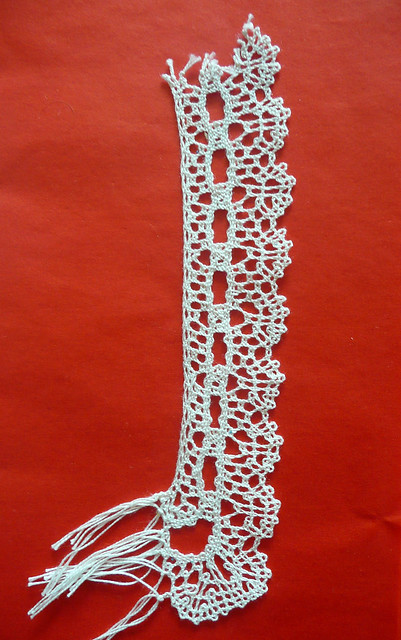 |
| Details: Cotton n°20, 30 bobbins. |
I also got a new toy! Yes, another camera. This time a Zenit E which is very special because this is a version that celebrates the Olympic Games in Moscow 1980. The camera is beautiful: leather body and perfectly working, even the selenium cells for the lightmeter work like new!

These are some pics of the first roll I used with it:
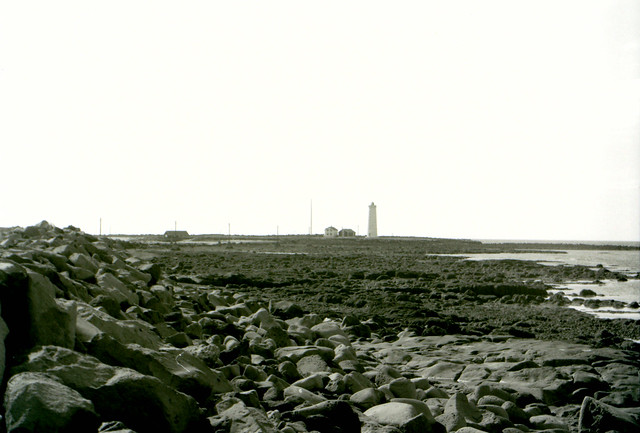 |
| Grótta |
 |
| Hveragerði |
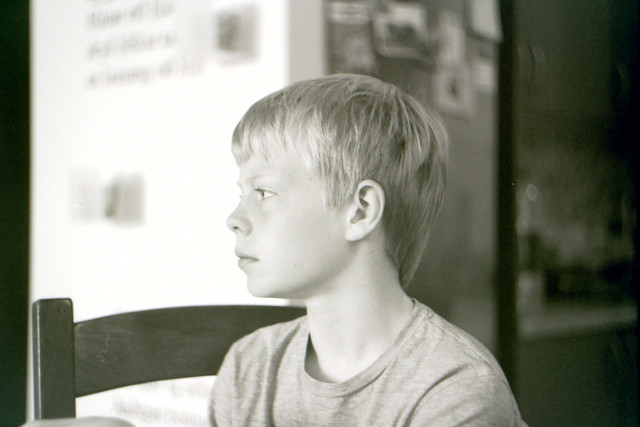 |
| JB |
 |
| HF |
And one last thing: Yesterday I went to Heimilisiðnaðarfélagið Íslands (Society of handcrafts of Iceland) to check some threads for bobbin lace because according to their website they had materials to make lace there. Well, they had some threads but only linen and just one number (and the price was not very nice: 17€ (2.800 ISK) for 500mt). They were also selling a pack of 50 bobbins and a bobbin lace pillow for 485€ (80.000 ISK). TOTALLY out of reality! I got my 50 bobbins for 25€ (4.000 ISK) in Spain and I made my own pillow with an Ikea table for only 30€ (5.000 ISK). So I saved 430 € (71.000 ISK)!! Unbelievable! I will DEFINETELY have to buy threads online!! What is it with prices here! That is something I really cannot get used to!
Esa seda negra se ve linda!! Definitivamente tengo envidia de tu colección de cámaras :)
ReplyDeleteEstás avanzando bastante con tu encaje de bolillos, y tu nuevo chal va a quedar muy padre. Saludos!
ohhh el nuevo chal /cuellito me parece tan lindo y mira como se teje, yo estoy con el libro estonian lace, en mente ya he tejido todos, y de mil colores jajaja,
ReplyDeletela lana, ohh esa lana es linda y suave,yo compré mucha lana de seda y cachemire y aun no la uso , pero ya vendra el momento ....
la camara preciosa, ohhh, que linda de verdad, cuestan caras?
bueno y lo del hilo , mira aqui sale barato muy barato el hilo, si necesitas dime ....
y de por alli me llegaran unas anitas, y que feliz estoy :)
besitos Rodri .. cuidate mucho
Not exactly quick and simple! But I'm sure it will come out beautifully!
ReplyDeleteIt'll be nice this choker
ReplyDeleteyou get by great with lace
you have beautiful pictures of fat
:P woooowww.. super interesante ese montaje del shawlette :P , :P todo bello,, felicidades por tus avances con el encaje,, .. la cámara .. un sueño ... pero ¡¿ que locura de precios!! jaja... saludos desde México :P
ReplyDeleteMuy bueno el método para el "chal" y me encantan tus fotos.
ReplyDeleteNosotros tenemos las cámaras viejas de nuestros "viejos", pero aprovechamos todos los lentes para una nikon digital. Una especie de reciclaje.
Gaman að sjá Fichu-ið myndast hjá þér,alltf svo gaman að prufa nýjar aðferðir!
ReplyDeleteOg spennandi að sjá hvað þú ákveður að gera úr silkinu!!
The perpendicular border is a really cool way of how to attach it! Thank you for describing it. I will definitely try it soon.
ReplyDeleteAnd the bobbin lace... You are one quick learner!
Ada: You should definetely try it! It works beautifully! :) You know I can help you if there anything you don´t understand :)
ReplyDeleteHi There
ReplyDeleteYour Fichu is really great!
I would like to know how you join the neckband with the rest of the work
Do you sew it or what?
I look forward to hearing from you.
Thanks
Matty
Hi Matty!
ReplyDeleteThe way to join the band and the rest of the Fichu is rather complicated. I am not sure I can explain it. This is, according to some people, one of the most difficult pattern in the book "Victorian Lace Today".
The thing is that the first thing you must do is to knit the band and then attach the rest of the Fichu as you knit it. It is very fun!
Do you have the book?