Showing posts with label estonian lace. Show all posts

Sunday, September 4, 2011

Making a matching greeting card and the next shawl

I was thinking about how to make a nice greeting card that would go together with the Harebell Fichu.

The first thing I knew was that the card HAD to have some knitting. Until now I had made cards using cross stitch and bobbin lace but never with a knitted piece.

Pichikemenküe y külpe ñimin
I made the cross stitch motif based on a traditional Mapuche (native culture from the south of Chile) pattern called Pichikemenküe and külpe ñimin.


Little sample: Done
I have talked about this one before but I never mentioned it was meat to be a wedding greeting card :)


The color choice was really easy, I used the leftovers of the einband I had from the Fichu. So, the only thing left to think about was the pattern.

I went for a very simple Lilly of the Valley pattern. I really like the simplicity and beauty of the Lilly of the Valley. The amount of yarn and time I used to make this was minimum. In a blink of an eye I had a cute greeting card that matched perfectly the Fichu.

Knitting - Card
So, first is first: knit the piece. Then cut the paper and use some glue.


Knitting - Card
The card is very simple. 


Knitting - Card
The final result is far from being perfect but I guess that is part of the charm of handmade things. 

Now that the Aeolian is done it is time make a new shawl.  I must admit that after knitting the Aeolian (which turned out to be much more beautiful than what I was expecting) and making Eva's lopapeysa I was a little bit uninspired... It took me a while to find what to do next. I started to look at my books and Ravelry and nothing seemed to catch my attention!

Until I found the problem. I needed to have someone to knit for! Things are so much easy when you have someone to knit for... then it is possible to think about patterns and colors that the person you're knitting for might like.

So, I began thinking about what could be the best for her.

First I thought that blue would have been a good color option for her so I got some Einband in a very nice light blue. The color looked great on the ball but once I knitted a swatch my opinion changed completely!! I really didn't like it for a shawl. I thought it would look great for ababy blanket or so.

Knitting swatch - Total fail.
The pattern didn't convinced me either. I even made some mistakes on the swatch... shame on me!

I needed to find a better color. I went to the wool store again and this time I found the perfect color! It is a very, very nice light green. It looks very organic and natural.

This color is much better!


The pattern I am making is taken from The Haapsalu Shawl book. It is leaves and nupps. What I like abput this pattern is the asymmetric position of the leaves and the movement it has bewteen each pattern repeat.  I also think that the color looks great in this pattern.

New shawl: Leaves and nupps
Leaves and nupps

I am planning to make an edge at the end that will be sewn to the body.

Now I am also starting to think about the next lopapeysa. On Ravelry there is a group called the Spanish Swap and we've been talking about making a Lopi KAL in September. I have already chosen the colors and today I was working on designing a pattern for the yoke using some ideas from the book Íslensk sjónabók.

More details about the lopapeysa soon!

I already have developed the films from my trip to the east. I will be sharing with you some of my favorite shots :)

Mjóifjörður
This was one of my favourite spot. This is Mjóifjörður (The narrow fjord). The road was terrible but the place is a paradise.


Austfirðir
One of MANY waterfalls everywhere.


Mjóifjörður
In Mjóifjörður there used to be a whale station. At the beginning of the 20th century there were up to 200 people living there. Today there is not whale station and only 30 people live there.


Mjóifjörður
Mjóifjörður. It was so quite. No wind and fog. 


A very decorated front yard in Eskifjörður
A very decorated front yard in a cute little house in Eskifjörður.


Héraðssandur
On the way to Vopnafjörður there is a gravel road that is the highest road in Iceland. This is the view from that road of Héraðssandur. 


Borgarfjörður eystri
The cutest house in Borgarfjörður eystri. 

Well, that is all for now!

Saturday, July 30, 2011

New book, Aolian progress and my lace super-pupil!

Tomorrow is Gummi's birthday and I was thiking about giving him an amazing icelandic book called Íslensk sjónabók (Ornaments and Patterns found in Iceland). I actually already bought it and gave it to him... I know! I couldn't wait until the actual birthday day! I am terrible!

Even the hard cover of the book is BEAUTIFUL!

This book is a compilation of patterns found in 17th to 19th century icelandic manuscripts. There are actually ten sjónabók manuscripts that have been preserved. The book contains all the patterns found in those manuscripts which have been redrawn digitally. It is a source of ideas with strong ties to Icelandic national heritage.

The book has 783 pages FULL of wonderful patterns that can be used for knitting, embroidery, cross stitch or whatever comes to your mind : ) It also comes with a CD! 

The book is a little bit pricey but it is worth every crown (króna). It is just WONDERFUL and the best of all... Gummi LOVED it!!

These are a few pages so you can see what I am talking about:


All the pages are arranged like this: to the left there are diagrams and to the right the drawings with color of the diagrams.

Some patterns could make beautiful wallpapers!


The Aeolian shawl is growing and growing. I have already started with the edge which is the main part of the whole shawl. At first I had decided to make the narrow edge version but finally I changed my mind and I am going for the full size version. I think it is going to look very, very good. I am very curious to see how it turns out!

Aeolian: Progress
This colors look so nice together! Don't you think?

The whole process of knitting this shawl has been pretty smooth. Except for a couple of SILLY mistakes I have made that have made me frog a couple of long eternal rows. The instructions are quite clear except for the set-up edge section which is made out of four charts:

- Right edge chart.
- Edge set-up chart.
- Center edge chart.
-Left edge chart.

The construction is as simple as:

* Knit the 2 or 3 stitched of the garter stitch tab.
* Begin with the right edge chart.
* Continue with the edge set-up chart repeating it as many times as necessary to get to the center stitch.
* Make the center edge chart once (between the stitch markers that are before and after the central stitch).
* Knit the edge set-up chart again as many times as necessary to get to the end of the row.
* Knit the right edge chart.
* Knit the 2 or 3 stitched of the garter stitch tab.

There IS something strange in the way this section is written in the pattern (at least I found it weird)... so I had to make up my own little instruction to get it right.

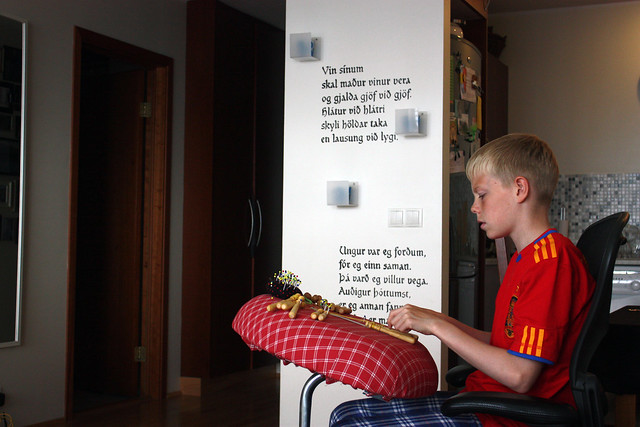
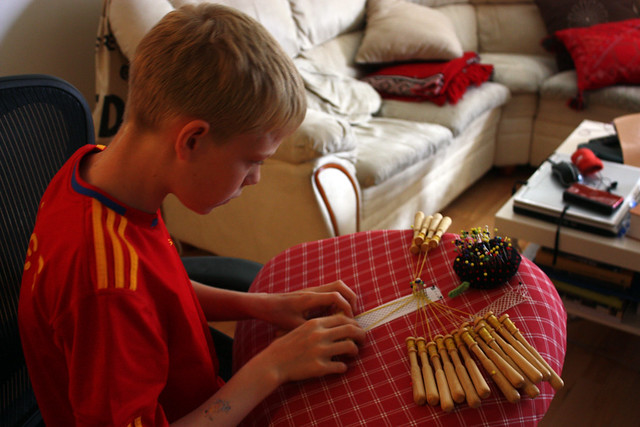
Today we were just at home, chilling out and Jóhann Birnir asked me, out of the blue, to teach him how to make bobbin lace. He is twelve years old and loves, loves, loooves handcrafts (and sports!). He is a great knitter himself!  Now, how could I possibly say no?!  IMPOSSIBLE!
Learning
Very concentrated.
Aprendiendo a usar los bolillos
Looking so PRO!
So, we started by loading the bobbins with some yellow, rather thick thread of linen. The first lesson: how to make a half stitch torchon ground. It was amazing how quicky he picked it up!! And how even the ground ended up! He made just a little piece because even though the thread looks really good it was kind of difficult to keep in the bobbins... somehow the knot that keeps the thread from running off the bobbins kept on running making it a little difficult to keep the bobbins in order. Anyways... Jóhann made a beautiful little first work!

Even and perfectly done!

I am so proud!! 

Thursday, June 30, 2011

The Liliac Leaf Shawl: Finally finished!!!

The Liliac Leaf Shawl is FINALLY finished!!

Liliac leaves
I love to see the pattern blossom after blocking. It looks so pretty!!


To had to put a little bit of thinking on how to block the stole. I usually use the bed which is normally big enough to hold shawls but this time this stole was way to long. I had to add a little piece to the bed. To do so I used a foam matress and my new Ikea bobbin lace pillow. It worked pretty well.

Blocking: edge
Blocking: wires and pins make miracles!


Blocking: grafted edge
Grafting is like magic. It is barely possible to say where the grafting is. Isn't it?

Blocking: Liliac leaves
The liliac leaf pattern. The pattern has so much movement  and that is thanks to the garter stitch frame around each leave.
Blocking has become so much easier since I got the blocking wires. Holy blocking wires. They don't only make the hole process easier but also the result is a lot better. The straight borders become really straight and the scallops look a lot more beautiful!

Notes about the shawl:

* Body pattern: Liliac Leaf Pattern 1 from the book The Haapsalu Shawl.

* Edge pattern: Taken from Madli Shawl from Knitted Lace of Estonia.

* 3 1/2  balls of Loðband (icelandic lace yarn) Each ball is 50g.

* Needles: 5.0 for casting on and off and 4.0 for knitting.

* Casted on 100 stitches using the knitted on cast on technique (my favourite for shawls).

* Made 34 repeats  of the 16 rows leaf pattern slipping the first stitch with the yarn in front of every row.

* Made two edges that I grafted to the each end of the body. When grafting watch the tension, it is ver easy to have an extremely tense graft with will be a problem when it comes to blocking.

*Final measurements: 62 x 230cm

Liliac leaf shawl
The hole thing :)


Finished
It is too bright outside but I guess that it is still possible to see the pattern.


Ready to be packed
Folded, ready to be packed and given :)
I am very, very, very, very happy with the result. It exceeded all my expectations :)

Tuesday, June 28, 2011

Almost finished shawl! New bobbin lace pillow! and new camera!

Since the last time I posted nothing much has really happened. I am still knitting the Liliac Shawl. It has been a long long process, especially because I haven't been 100% focused in it. While I was knitting it I finished a lopapeysa and also started to play with bobbin lace... so my time was divided between these three and some other things.

Edge
Edge: Soon to be finished and ready to be grafted.


The shawl is ALMOST done. I ended up knitting 34 repeats of the pattern instead of the 30 that I had in mind at first. I don't know what I was thinking when I thought that 30 would be enough! Anyways, I stopped at 34 because I changed my mind about the lace edge. My original idea was to make the lace edge in two long pieces and then sew it all around the body of the shawl. The edge was going to be really simple, with some nupps and no more than 4-5 cm wide. On the way I realized that it would be so much better to make two lace edges for each end of the shawl only and keep the long sides of the body straight with no edge and no scallops.

Liliac stole
34 leaf repeats. 1 edge already grafted.


Since I decided to change the edges in the very last moment that meant a little bit of an extra work for me. Normally, when a shawl has a lace edge at each end, one must start knitting one edge, then continue with the body and leave live stitched on the other side. Then, the second edge is knitted on a new pair of needles and finally grafted to the body of the shawl.

Grafting is always a challenge, especially when there are 100 stitches to graft. I remember the first time I used Kitchener stitch and I had to turn everything off: no TV, no music, nothing that could distract me and all that for grafting 8 stitches! Now I am much more relaxed about it but I always have to be checking the tension. It is really easy to get the grafted stitches TOO tense and then when it comes to blocking it is possible to break the thread and end up with a TERRIBLE disaster!

Grafted edge
Grafted edge. (Kitchener stitch)


The thing is that I casted on, knitted the body of the shawl and casted off, thinking that I was going to sew the edge all around. I knitted one lace edge and had to undo the cast off border in order to graft. It wasn't so difficult. The difficult part was to undo the cast on border to get the live stitches there. Uff. Everytime I knit stoles I use the knitted cast on technique (I think it is the best cast on for this kind of projects... it VERY elastic). Undoing it was a long process. It must have taken me about an hour to undo 100 stitches.

Live stitches
Live stitches waiting to be grafted.


Now, I have the live stitches and I have already began the secong lace edge. I am very excited about blocking this!! Can hardly wait to see it finished! And begin a new, fresh project!

About bobbin lace, I am still making exercises. I am done with seven so far (out of 10).

These are the last exercises:

This one was especially tricky because there is a huge mistake in the book! And I mean HUGE. It is amazing how a mistake in a book can make your life miserable for a couple of hours because the first automatic thought is always "I am not getting it, the book must be right, not me". Well, the book was wrong... it actually made NO SENSE at all. If any of you has a book by Bridget M. Cook  called "Encaje de bolillos. Curso completo de encaje de bolillos: Explicación de las técnicas básicas, con picados y diagramas de 28 motivos"  in spanish (I don't know if it is also wrong in the original english version)and is going to make this exercise do not read the instructions, instead, look at the diagram (or ask me how to do it :)
Punto de la virgen
The Virgin ground (I guess it is called like that because of the cross)

Filigree stitch (punto de filigrana). This one is pretty simple and fun to make. It is a combination of half stitch and cloth stitch torchon.

Fiigrana
Punto de filigrana


This is the Spirit stitch (punto de espíritu). It is very tricky to make the spirits (the squares suspended in the net are called spirits). It is a bit difficult to have perfectly square. To get the right shape it is necessary to keep the bobbins of the sides very tense all the time, if not the result is an inverted triangle. In the book there is a funny line at the end of the exercise that says that getting a perfectly square spirit is a reason to feel proud for a FEMALE bobbin lace maker (encajera in spanish). The book is clearly written for women :p I guess I should be proud... my spirits are not so bad to be the first time, aren't they?

Spirit stitch


I also made a new pillow. I was looking around in the internet searching for bobbin lace blogs and an amazing blog from Asturias came my way! There I found a great idea: An Ikea table converted in a bobbin lace pillow. Brilliant!

So, I made one for myself. I used:

* Dave (Ikea cheap laptop table)
* Polyetilene
* Foam
* Old lopapeysa (well, actually brand new, never finished because I didn't like it) that I felted in the washing machine (40°C). The result is an incredibly thick and dense fabric.
* Fabric
* Glue
* Stapler


1
Several layers of foam and polyetilene


2
Cut the sleeves of the felted lopapysa, ready to sew the holes.


3
Holes are sewed and fabric is stretched.
4
Cotton fabric on top: Ready to be used!
8
With the leftovers I made a pin cushion.

It works really well but I am thinking about shaping the foam a little more to make the border more rounded, I think that it is too flat and square as it is. I still have to try it some more and see. 


A few weeks ago I got a new toy. I bought an old half frame camera (that means that it is possible to take two pictures per frame of film, so it is possible to make 72 pictures out of a 36 pictures film, neat!).


The camera is a Canon Demi S. It was made in 1964 and it is working amazingly well! The selenium photosensor still works well so the lightmeter is pretty reliable. Beautiful piece!


These are some pics I took with it:


::


*


**


Little thing
I was walking and I saw a little piece of fur next to the road. At first I thought it was a pouch or something like that until this little thing decided to show the face. It is not a mouse... it didn't have a long tail. Is it a wild hamster!?