At the beginning of January a good friend of mine asked me if I could knit a lopapeysa for her mother who was visiting her from Poland... and as maybe many of you know I can't say no to my friends! So, I took the new task and began from the beginning... as it should be: choosing pattern and colors.
There is a pattern that is hugely popular in Iceland. There is a company of designers that is called Farmer's Market that took a very classical lopapeysa pattern (Lopi 120) and made some little changes to it (mostly in the way colors are used... because I think that the pattern itself is unaltered) and it became a huge success, mostly I think because the company has a very smart way of showing their products with great photography and style (as you can see in their website).
Taken from Ístex.is
Well... It was no surprise for me that she chose THAT pattern. I almost even expected that, hehe. And when it came to having to choose colors... uuh surprise again!... she chose a color combo that is very similar to the one I have used to knit other three lopapeysas. It is a very nice color combo... it looks really good and classy.
Kristina
Laura
Lærke
So... the colors she chose were moss green as main color, pink (a darker pink compared to the three above) and off-white.
So Marlena's lopapeysa looks like this:
Folded and ready.
Materials:
* Yarn: Double folded plötulopi.
* Needles: 4.5 and 5.5 mm
Anna María trying her mom's jersey. She liked it so much that she also wants one! So there might be yet another one like this in the future :)
Detail on the ribbing (see the notes).
Notes:
* This time I did some things different. This lopapeysa is not exactly as the others:
I used my new favorite cast-on: The Twisted German Cast-on. I really like it a lot and I highly recommend it. It is very similar to the normal long tail cast on but it adds a twist to the yarn which makes it be stronger and much more elastic.
I used a different kind of ribbing. For the other three I used just moss stitch. What I did now was to knit one row in 1x1 ribbing and then one knitted row ( *[row1: K1P1; row2: K all] repeat from the *). It is very flat, it has a great texture and I find it somehow to be very feminine but strong at the same time. Does anybody know if this kind of ribbing has any special name?
The neck line is not as wide in this one. I made it using the same ribbing I described before and it is double (it is folded and sewn inside). For the other ones I just finished the pattern and did the cast-off with no ribbing.
For the cast-off I used one of my favorite ones: The knit two together through the back loop (is it also called the decrease cast-off??) using a needle 1mm bigger. The result is stretchy enough to do the sewing of the folded neckline.
* When I finished this lopapeysa, while I was putting it on Ravelry I started to count how many icelandic jerseys and vests I have made this far: This is number 20!! And the funny thing is that of those 6 have the same pattern and of those 4 are moss green+pink+off-white and the other 2 are black-gray-white. You see? This is a very popular pattern!
Well, now this pullover must be flying to Poland! I hope that Marlena will use it a lot!
Now, I finally got some pictures of the happy owners of the honeycomb hats (Mesi) I knitted at the end of last year!
Kristín Gaia... she chose this colors, aren't they great together?
Kristín Gaia.
Nicolás.
And finally... a little secret. I think I have never shared this openly and yesterday I realized that there are even friends who don't know about it (I was actually at a café with Sif yesterday when she saw it... she had no idea I had it!!)... Well, here it is: I have a tattoo :p
I got it about a year and half ago... so you can see how important knitting is for me :)
Two Fridays ago I was invited to a birthday party. My superdear friend Sif was going to celebrate her birthday. Last year I gave her a shoulderette that she really liked (luckily because I didn't know which were her favorite colors so I just chose one that I thought she could like... and that I really liked myself when I saw it hanging in my LYS).
Echo Flower. Yarn: Malabrigo lace.
This year, I didn't have enough time to prepare a present like a shawl or anything bigger so I had to think fast and come up with something quick because I think that hand made presents are always the best thing that one can receive. I had only two days to make something. So I went for a hand made pin (or brooch).
This time I didn't knit it. I used cross stitch and my favorite pattern: Houndstooth. It is a very quick, easy and good looking thing to make.
Then I attached it to a card and put it in an envelope.
Along with the brooch I gave her a book. I went to the University Bookstore where they have a little collection of books in spanish (yes, Sif speaks spanish BEAUTIFULLY!) and among those there were a few books from Chilean authors. I gave her one my favorite books: La amortajada, written by María Luisa Bombal.(I also found another of my favorites: Rimas y leyendas by Gustavo Adolfo Bécquer, I HAVE to get it for myself!).
During the weekend I finally got some pictures taken of me wearing Þröstur. The days are getting shorter and shorter around here and one thing I like about that is that everytime that is not cloudy the short hours of light we have are beautiful. There is a certain softness in it that lightens everything up in the most beautiful way. Saturday was like that.
So we took a walk to the pond that is right behind our neighborhood (for those who don't know the place where I live is completely built on lava, there are not many trees but it is really pretty to walk around). It was so quite, almost no wind at all.
I also want to share a few pictures I took with the film camera that Judigenerously sent me (along with other treasures). These pictures are from Álafoss, the place where Lopi is produced and sold.
It is a really nice place. Even though it is possible to buy lopi everywhere, even in the supermarket, I always choose to drive to Álafoss. And it is not only that the place is cool but the people working there is just adorable!
So, for all of you who have bought lopi... this is where it comes from :)
This is the building where the shop is.
There are several old buildings: the wool shop, some workshops, a café and the recording studio of Sigur Rós.
Detail of the bridge over the little river. Everything is "stitch-related". Cute, isn't it?
Álafoss or Eel's waterfall
I have been going to buy lopi to Álafoss for almost three years and I had NEVER seen the waterfall until now!! How silly is that!
I have finally finished the lopapeysa I was working on for the KAL of the Spanish Swap (group on Ravelry).
And here it is:
Þröstur
Details:
* Pattern: I made it myself! Yes, my first one!
* Yarn: Plötulopi (double strand).
* Needles: 4.5mm for the ribbing ad 5.5 for the rest.
Notes:
* When I started to knit this lopapeysa I wasn't sure about how it was going to end... at all. The first thing I did was to work the waist pattern which I decided not to use in the arms because it was a little bit to big... so I designed a second pattern for the sleeves.
* The whole thing was turning very "flowery". My first idea for the yoke was to make a pattern using the traditional eight points star (or rose) and then some more flowers... but changed my mind and I went for birds (instead of even more flowers).
* I thought that birds and flowers could be a very nice (and somehow logical) combination. So, the birds gave the name to the pattern: ÞRÖSTUR, which means thrush or tordo in spanish. I have always thought that I have ever had to take an icelandic name for myself it would be Þröstur!
The yoke.
* While I was knitting the yoke I wasn't sure wether I was liking it or not (in terms of the colors, especially the lime green, and the pattern itself). I had a lot of doubts about how the whole thing was going to turn out. The yoke was pretty much designed on the run... while knitting.
* I am very satisfied with the whole thing. I am really looking forward to trying to design again!
A few months ago I knitted a lopapeysa for my friend JC that lives in Buenos Aires, Argentina. Maybe you remember this picture of him:
Well, last week I got this package from the post office:
Yes! A package from JC! He chose a picture from my Flickr gallery (which is the same I have as avatar for my blog :) and made this:
Rodrigo en Þingvallavatn
When I took it out of the box I couldn't believe how wonderful the painting was! It is just perfect! This is the first time that someone makes a painting of me... it is weird (but a good kind of weird, of course) to see one's self painted! Isn't it beautiful!?
This isn't a very good picture. There was something strange going on with the light today... I don´t know. This is just so you can have an idea of the size of the painting.
Now I have to find someone who can frame it nicely to hang it :)
Thank you so much JC for such a wonderful piece of art and friendship!
Among all the things there was a pair of needles that belonged to her grandmother. A pair of double pointed needles size 3 (3.25mm) and 11" (27cm) in lenght.
Well, I think it is such a nice piece (almost like a museum piece) that I was thinking that it would be nice to have them framed. To do so I needed to find a nice frame that would honour the beauty of this needles.
Last weekend we went to a farmer's market very close to Reykjavík (in Mosfellsbær) to buy some fresh and locally produced vegetables.
Tiny market in Mosfellsdalur
When we were coming to the market and just before entering into the farm I saw a couple of women that were taking things out of their car and putting them on a table. They were probably getting rid of some old things by selling them outside of the market. One of them was very familiar... I actually recognized her almost immediately: it was Hafdís Huld, an icelandic singer (know fro having been part of a band called Gusgus and now for her solo career).
After having bought some vegetables I stopped by to take a look at what they were selling. And yes! They had a perfect frame for my needles! So, I bought an old frame for only 250 ISK (about 2USD)!!
This is how it looks :)
For those who don't know her, this is one my favourite songs and video of her:
A little bit about knitting.
On Ravelry, in the Spanish swap group, a few weeks ago was proposed to make a new KAL and this time it would be to knit a lopapeysa. The KAL was suposed to begin in September but there is a little bit of delay because some of the people who is taking part of it are waiting for the wool (lopi) to arrive (since they made the order on the internet).
In the mean time I have been thinking about what pattern to use for the yoke, sleeves and waist. I really didn't feel like using any from the magazines. I think I have alreadt knitted all myt favourite ones so that meant only one thing: It was time to try to make my own pattern.
With the help of the book Íslensk sjónabók I have been trying to make the charts using paper and color.
Messy charts!
It is not as simple as I thought. It is kind of complicated to find the right spots to put the decreases but with some patience I guess I will work this out. I still haven't finished the yoke pattern... I guess i will decide how to finish on the go. I don't know. I will see.
I already chose the colors and decided to begin just to see how the waist pattern would look like. I think it doesn't look so bad at all!
What do you think? :)
Besides this I am knitting a shawl based on an Estonian pattern and recently me, Gummi and Kristín have started a new KAL. We are now knitting a Hyrna Herborgar (which will my my 3rd!). Which reminds me that I still have to post the pictures of our first KAL (the Aeolian!).
Next time I will be talking abut the new shawl, the new KAL and the old KAL pictures!
Now, I want to hand a few pictures from the southeast... pictures of Vatnajökull, the largest glaciar in Iceland as seen from the road : )
Even though Eva's lopapeysa is already finished and with her in Berlin I have neither shown pictures of it since the steeking neither talked about the details!
So here it is:
Folded and ready to go!
Details:
* Yoke pattern: Taken from Héla, changing the colors and their distribution. (available for free at www.istex.is).
* Yarn: Plötulopi (double thread).
* Needles: 4.5 for ribbing and 5.5 for the rest. Crochet hook 4.5mm.
* Size: To fit Eva.
Notes:
* This lopapeysa was knitted just like any other from bottom up.
* I made a 2x2 ribbing.
* Knitted the body and the both sleeves and joined them to knit the yoke.
* Since this was going to be a cardigan I added two purl stitches in the middle to be able to sew and steek.
* This was the first time I was knitting a cardigan with a hood. The hood is knitted flat, shaping it with a few increases.
* The pattern on the hood was also knitted flat. This was the most challenging part of the hole lopapeysa. I had never knitted fair isle flat before.I must admit that I hated it (a little bit), especially the purled rows!
* To make the pattern on the hood is was also necessary to apply intarsia. Also my first time. It wasn't difficult at all! The important thing is to twist the yarns in order to avoid holes where the colors change.
* Finally, the hood was grafted using kitchener stitch.
* After steeking I made a crocheted border using black double folded lopi with a hook one size smaller that the needles I used to knit the cardigan. I made single crochet (sc) every other stitch along the edge.
Now, a couple of pictures of Eva wearing her new lopapeysa!! [Pictures taken by Kristina, you can check her gallery here]
Eva
The hood.
I made a new minilopapeysa keyring to check if the tutorial I made before was OK.
Trying new colors and checking the tutorial.
Well, I had to fix a couple of things, nothing terrible.
Two changes:
* The decreases of the yoke: The second row if decreases should be [k1, k2tog] instead of [k2, k2tog].
* And the 1x1 ribbing of the seck should be just 1 row and cast off tightly instead of 2 rows.
And finally, last night I saw the northern lights for the first time this season! They were not as strong (and also the moon was WAY too bright!) and they were not dancing so much but they were easily spotted.
This is the first time I see them so early in September... now this is just the beginning of the northern lights season! There will be plenty of time to spot them again... at least until april!
Here are some of the pics I took last night:
Taken from Álftanes.
Aurora borealis over Reykjavík.
Over Reykjavík.
From Álftanes looking to the west.
From Álftanes. I really like it when it is possible to see the reflection of the light on the water.
Well, well. This week was devoted to steeking. This was the first time a did it myself (with lots of help from Gummi, whose first time was also this!).
Before steeking the lopapeysa, I made a little exercise.
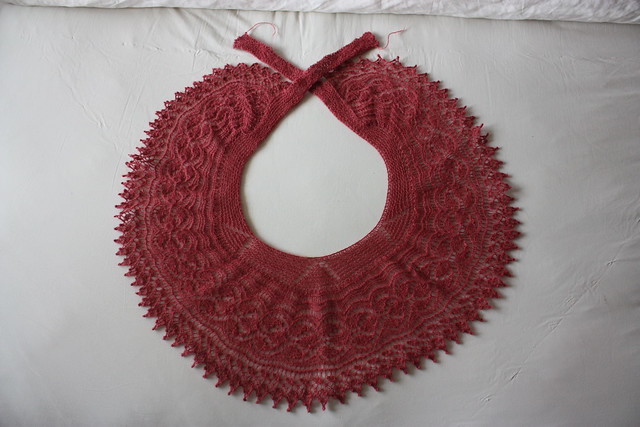
Harebell Fichu
Remember the Harebell fichu that I knitted a few weeks ago? As soon as I finished it and bloked it I had the impression that it had turned put to be TOO big to be held around any woman's shoulders. I actually tried it on several friends and yes... it is too big to tie it in front. So, I decided to cut the bands so it can be used wrapped around the neck and shoulders and maybe held with a brooch if desired.
This was the perfect moment to try to cut a knitted piece as a practice before cutting the big project: Eva's hoodie lopapeysa.
The first step: Using a sewing machine back and forth:
After that the place to cut is secured and ready for the action:
Now... scissors:
And voilà, the band is gone!:
After cutting I made a single crochet edge to make it look better:
And now it is REALLY ready to be used!!
So, after the little training we were ready to take the big task: Cutting the lopapeysa.
The steps are the same:
Sewing to secure the edges.
Back and forth on each purling.
Let the action begin!
Be careful with the blade of the scissor that you don't see... I almost cut the back of the cardigan!
Getting to the yoke.
Almost there!
And done!
Then the crochet edge:
Now it is ready to get the zipper!
I must admit that the idea of cutting the knitting sounds TERRIBLE and SCARY but it is not! The important thing, in the case of a cardigan, is to make the "path" where the sewing will go. In this case I made a colums made up of two purled stitches. Then the sewing machine dies it all! In this case I also made a double sewing on both edges so I could cut between them.
So, don't be scared of doing this! I think it is very difficult to mess it all.
Today I am going to visit my friend (who is a seamstress) to put the zipper... I think that dointg that goes a lot over my sewing skills... that are very little in fact :)
Finally, as I promised here are some pictures of my last trip to the East Fjords!
Alex gave the idea of making a clip... which was brilliant! Other wise I would have had to upload TONS of pictures! The only problem with the clip is that the resolution of pictures is lost a little bit... but I guess it looks alright :)